

High Key Black and White Edits
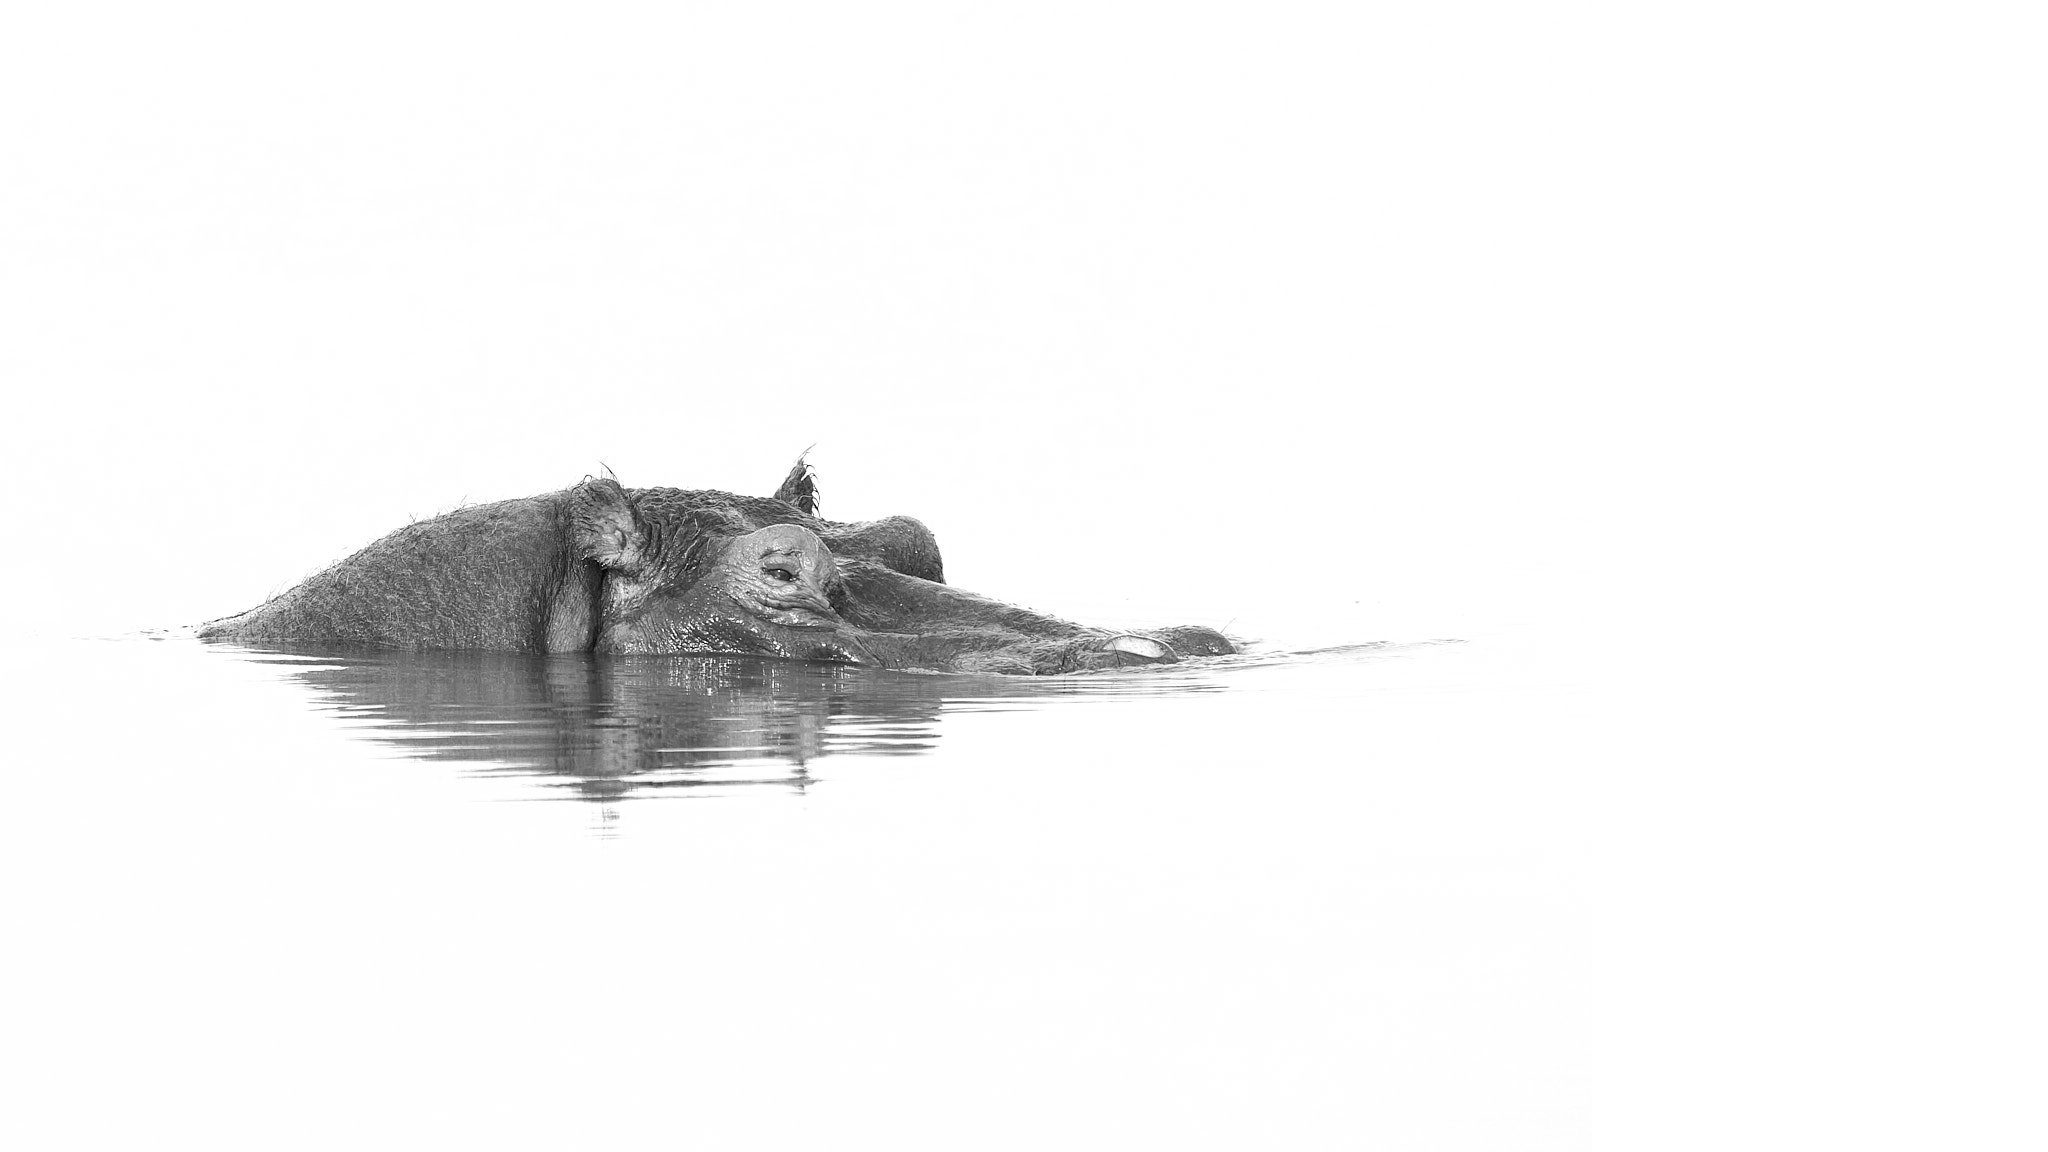
Table of Contents
I recently wrote about my wildlife photography post-processing workflow, and I mentioned that I use Photo Mechanic to ingest all of the images from a shoot. With fifty-megapixel files or larger, this can result in a large storage cost, but what is the payoff for storing these files? The path of a photographer is one of constant learning, from learning different capture techniques to the constant changes to the software we use in the “darkroom.” As knowledge is gained, some skills can be applied to images that may already exist. In this article, I will outline an editing technique I learned that allowed me to transform images that I had once passed over and give them new life.
High Key Black and White Edits
While I often learn things through trial and error, this is not one of them. I discovered the high-key, high-contrast black-and-white technique in a video by Steve Perry from Backcountry Gallery. I have included the video below as it provides the foundational background for this concept. Unlike in other photography genres, wildlife photographers have limited to no control over our subject. Requesting a wild lion to move in front of a bush so you can photograph a clean background instead of a blue sky will rarely be obliged.
Image Selection
Look for subjects with strong contrasts, intricate textures, and interesting patterns. Animals with unique fur or feather patterns, such as zebras or penguins, often make great subjects for high-key black-and-white edits. Pay attention to the lighting conditions since these edits rely on bright, even lighting. If you already have images in your catalog, search for shots with subjects that stand out against a light or white background. These images can be transformed into high-key black-and-white edits by enhancing the contrasts and adjusting the tonal values to create a pleasing range of whites and grays. Remember, the key is to capture the subject in a way that emphasizes its beauty and showcases its unique characteristics, ensuring that it stands out from the background.
The High-Key Black and White Technique
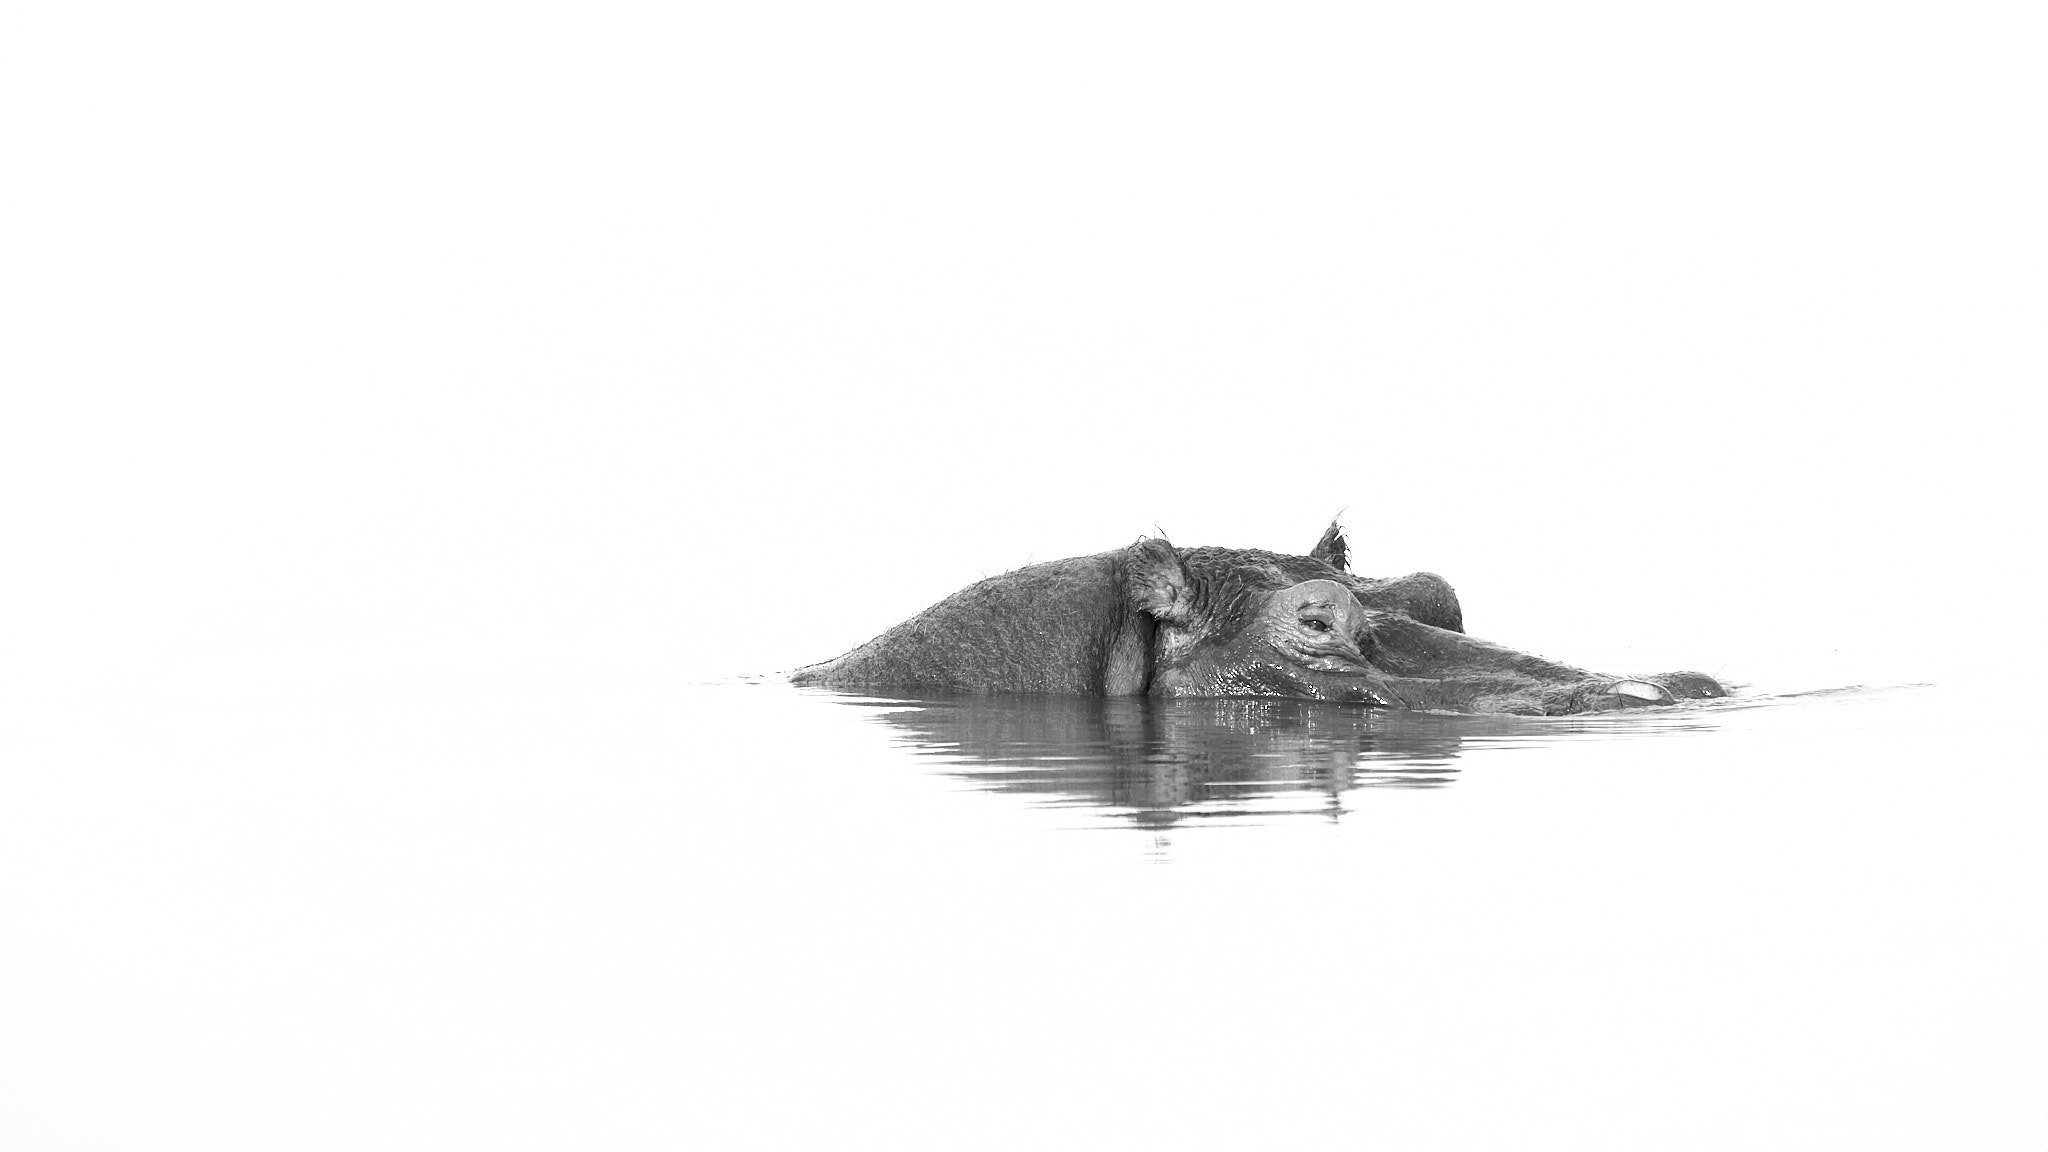
The high-key black-and-white technique is an editing style that takes advantage of challenging lighting conditions that may otherwise render an image unusable. This article outlines how converting your existing photos into high-key black and white may give them new life. The resulting look is a majority white image with the background almost entirely white and the subject highly contrasted against it. Photos edited this way often have a fine art appeal found in modern decor.
As with any editing article I publish, the assumption for this is that the images are RAW and not jpegs. The steps below follow a basic workflow; however, each image will have unique requirements. Most popular RAW editors like Capture One, Lightroom, or Adobe CameraRAW can do this type of edit.
Basic exposure adjustments for the subject.
This step should focus on getting a balanced exposure for the subject. If the highlights in the background become blown out, that is ok. The goal is to blow the background out anyway.
Adjust overall image contrast.
Adjusting the contrast again with a focus on the subject. Furthermore, there is no need to be concerned with the background as the goal is to push the highlights on the background to all-white. If areas of the subject blow out, they can be corrected later with localized adjustments.
Convert the image to black and white.
Each editing software will be different, but most have a panel dedicated to converting an image to black and white.
Adjust color levels in the black and white panel.
The color level adjustments can be a powerful tool in a high-key edit. They control how each color is converted.
Increase background exposure levels.
Tools like subject masking in Lightroom and Photoshop can be used to select the background.
Localized exposure adjustments to the subject to ensure it is not overexposed.
During this step, recover any areas of the subject that may have blown highlights or crushed shadows that may have occurred during the previous steps. This might take several layers or localized masks.
Subject localized contrast and detail adjustments.
This final step is where you may add structure, texture, or sharpening to enhance the look of the image. During this step, I will also ensure that my subject’s eyes have plenty of detail.
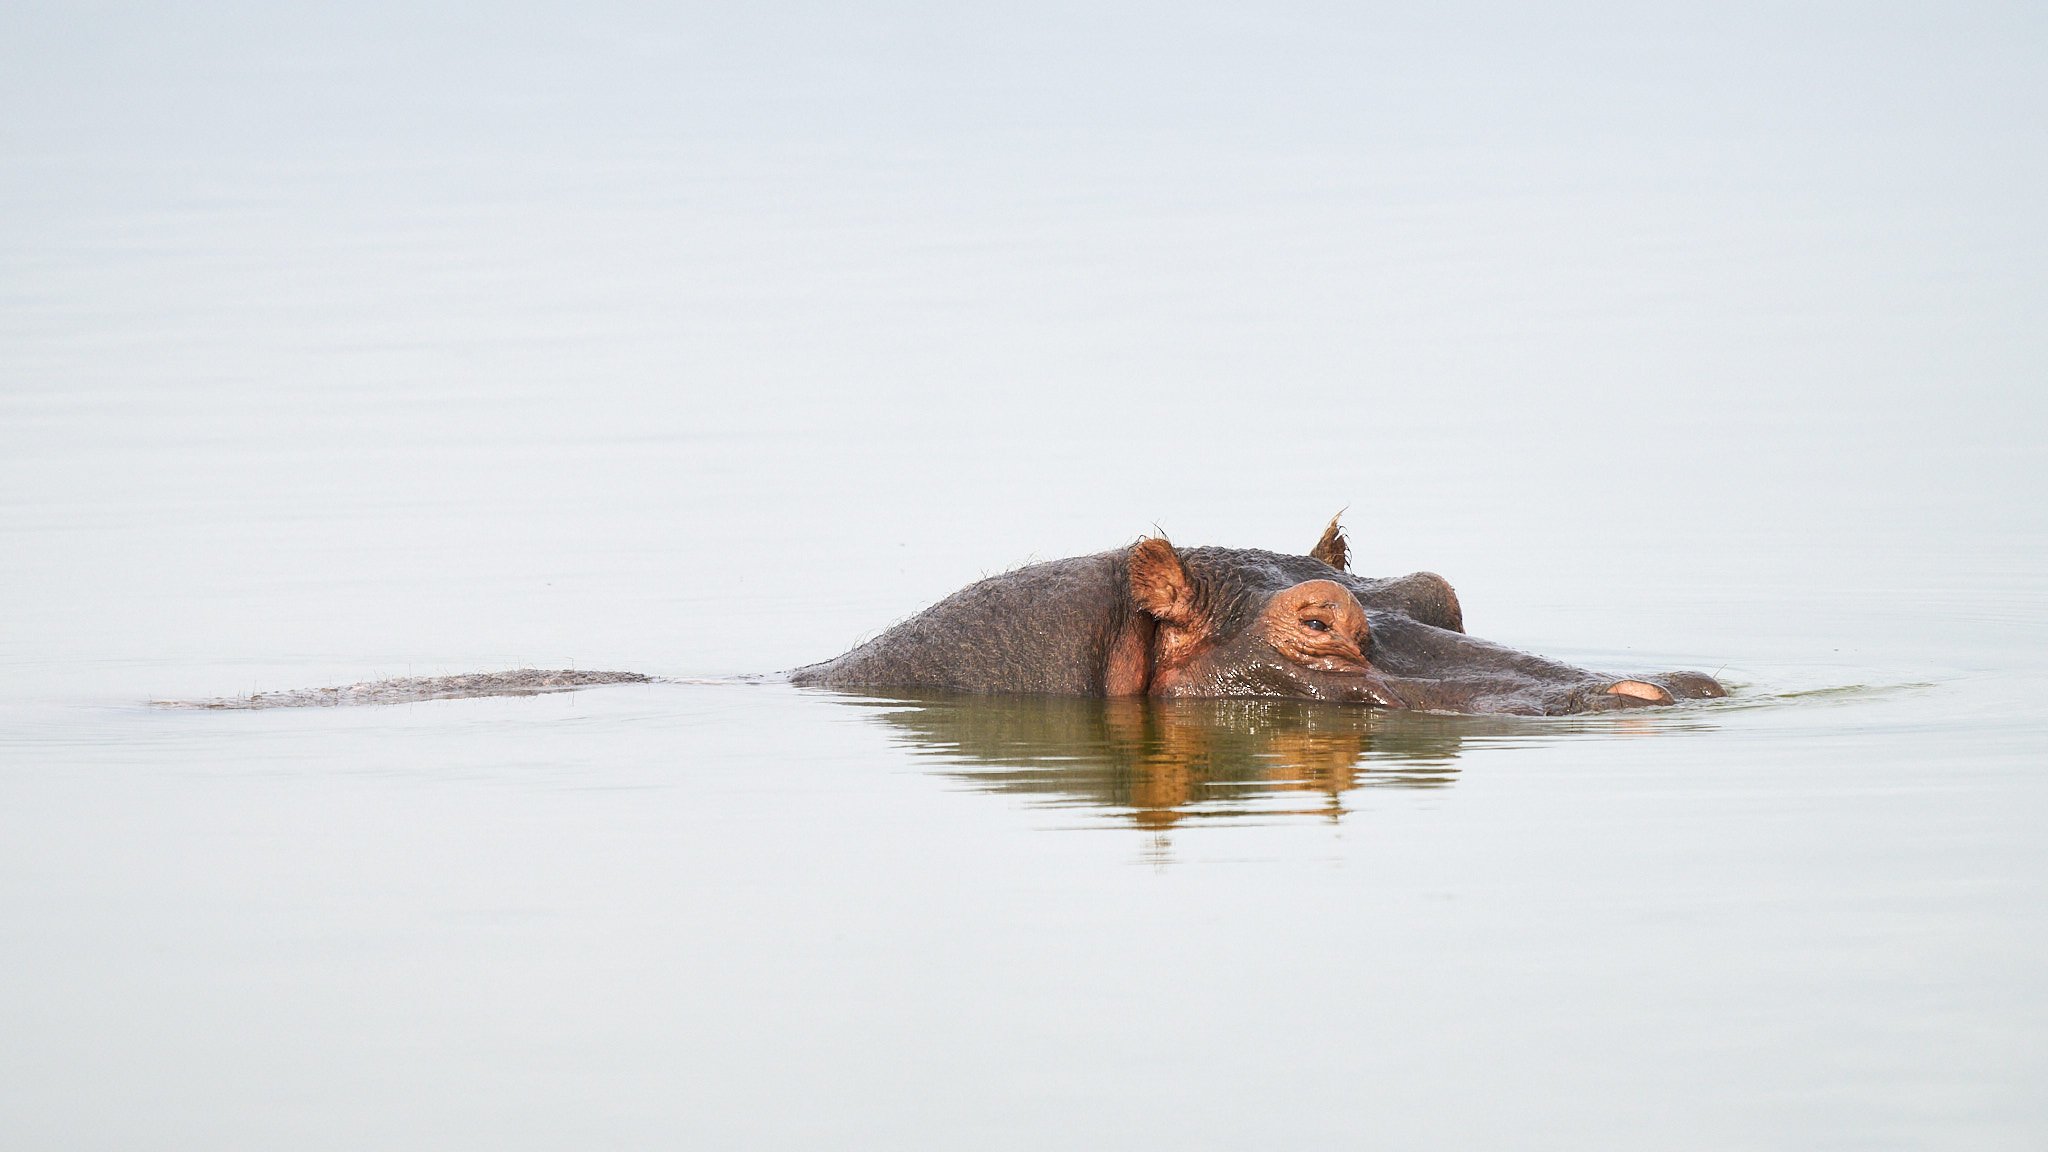
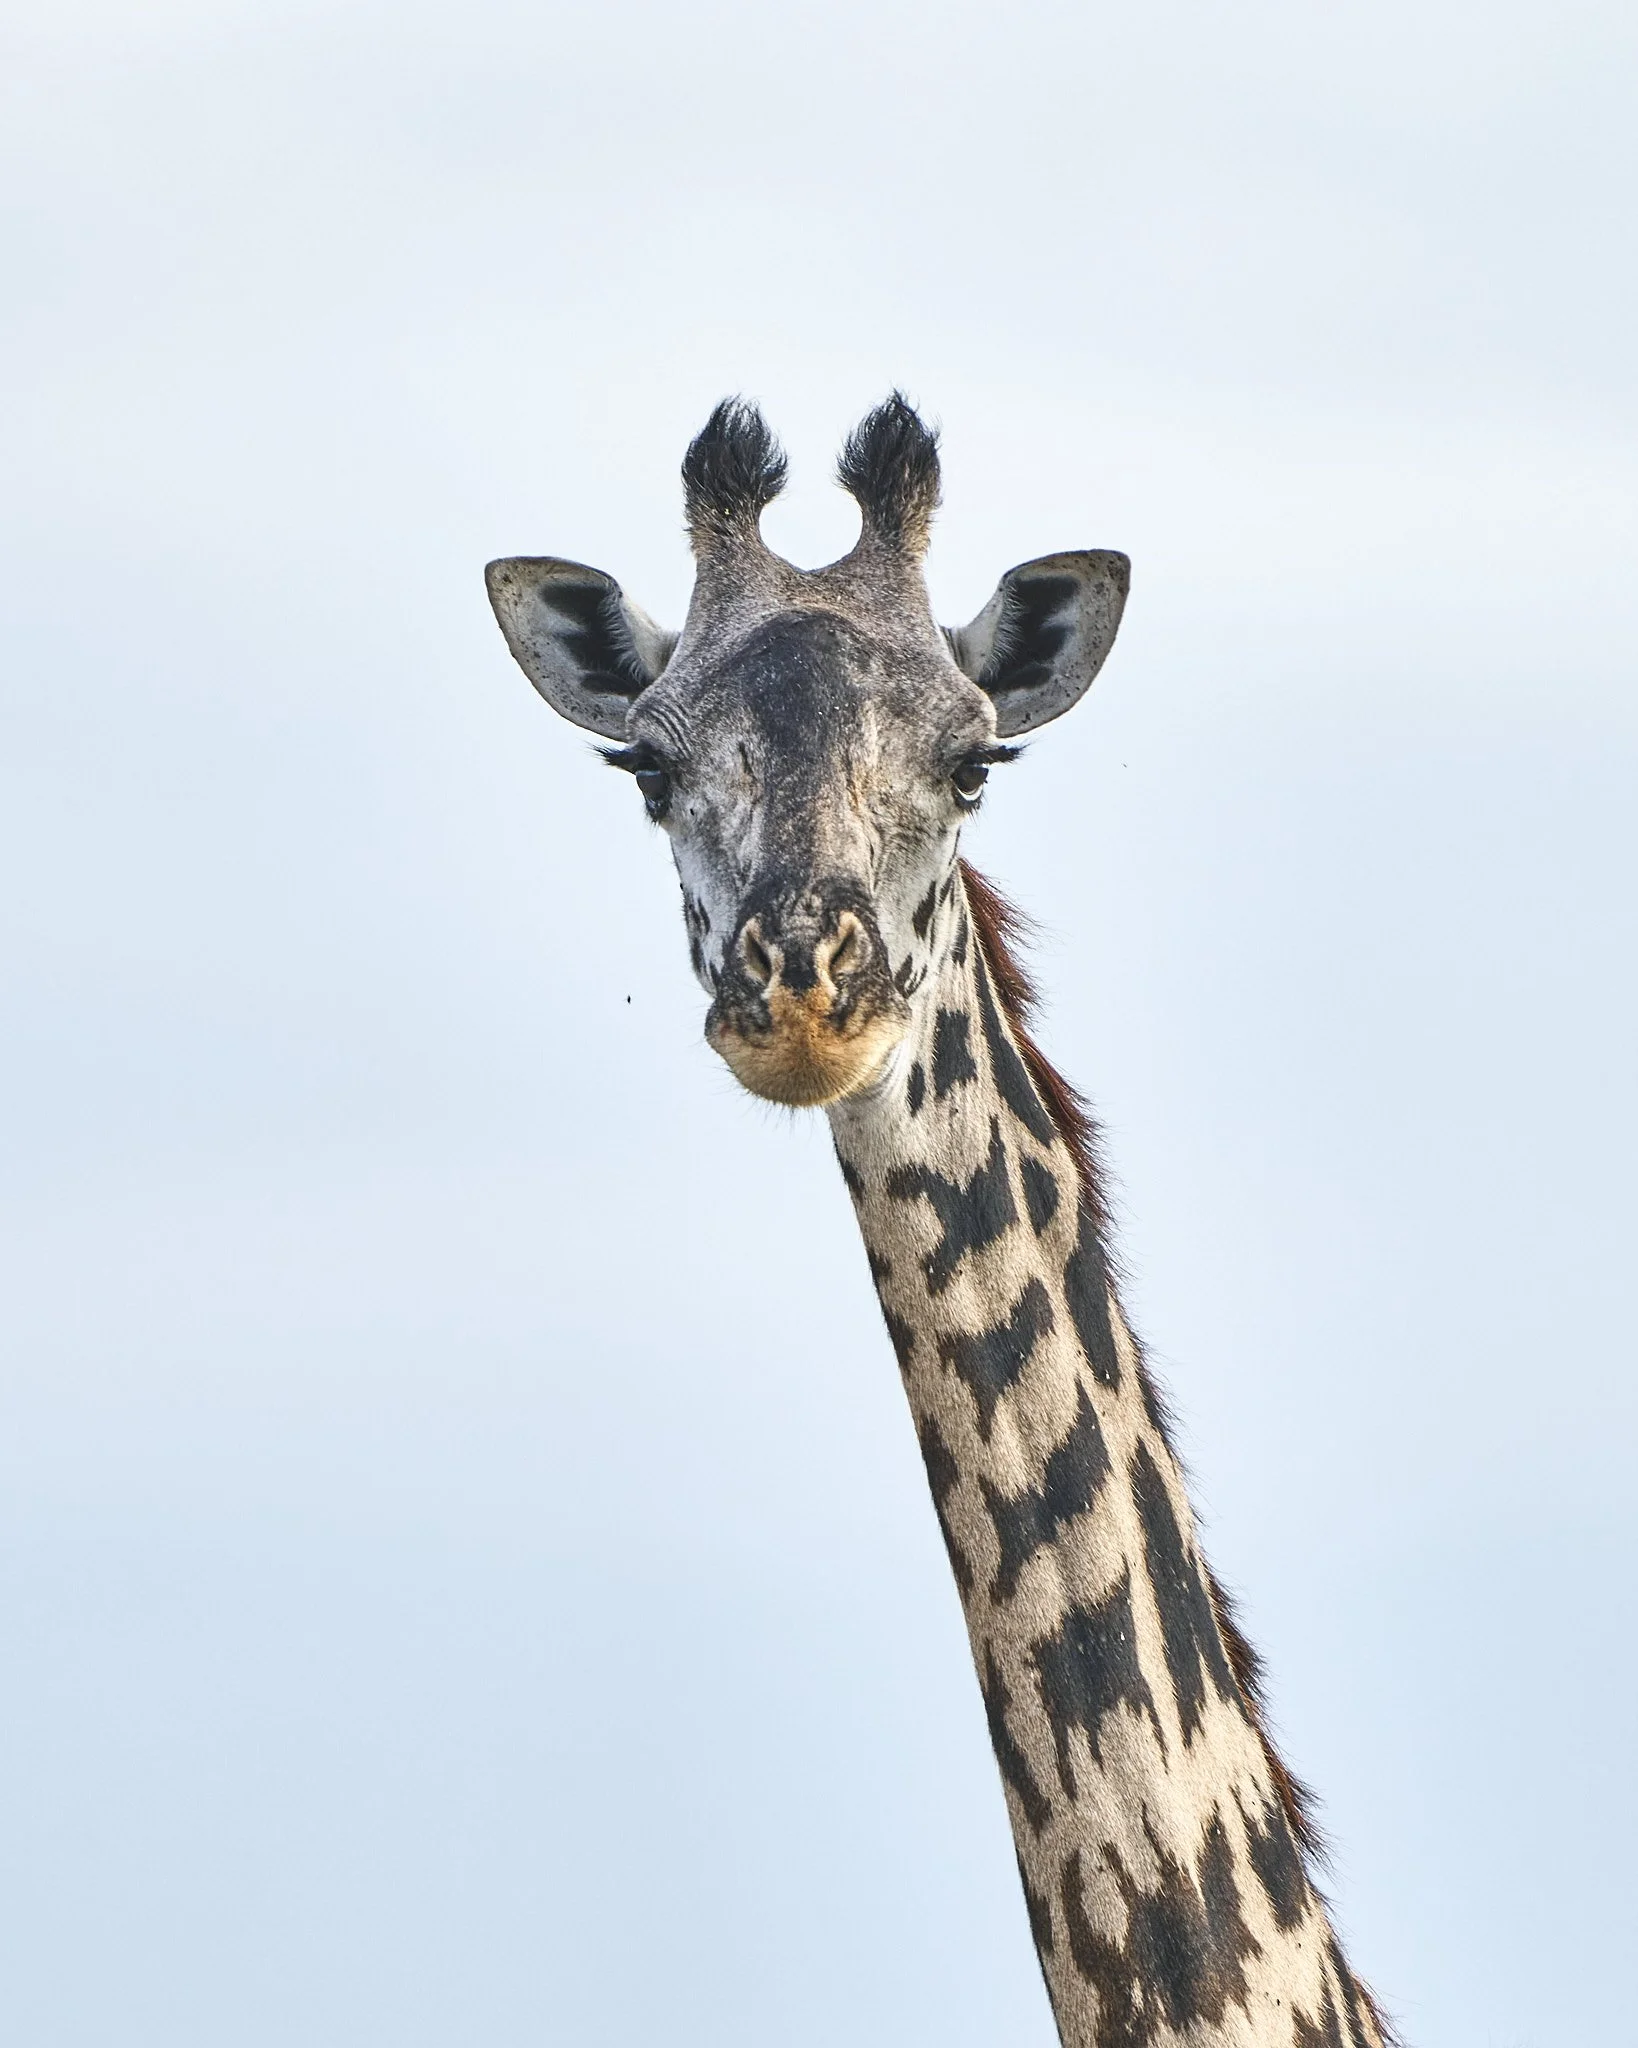
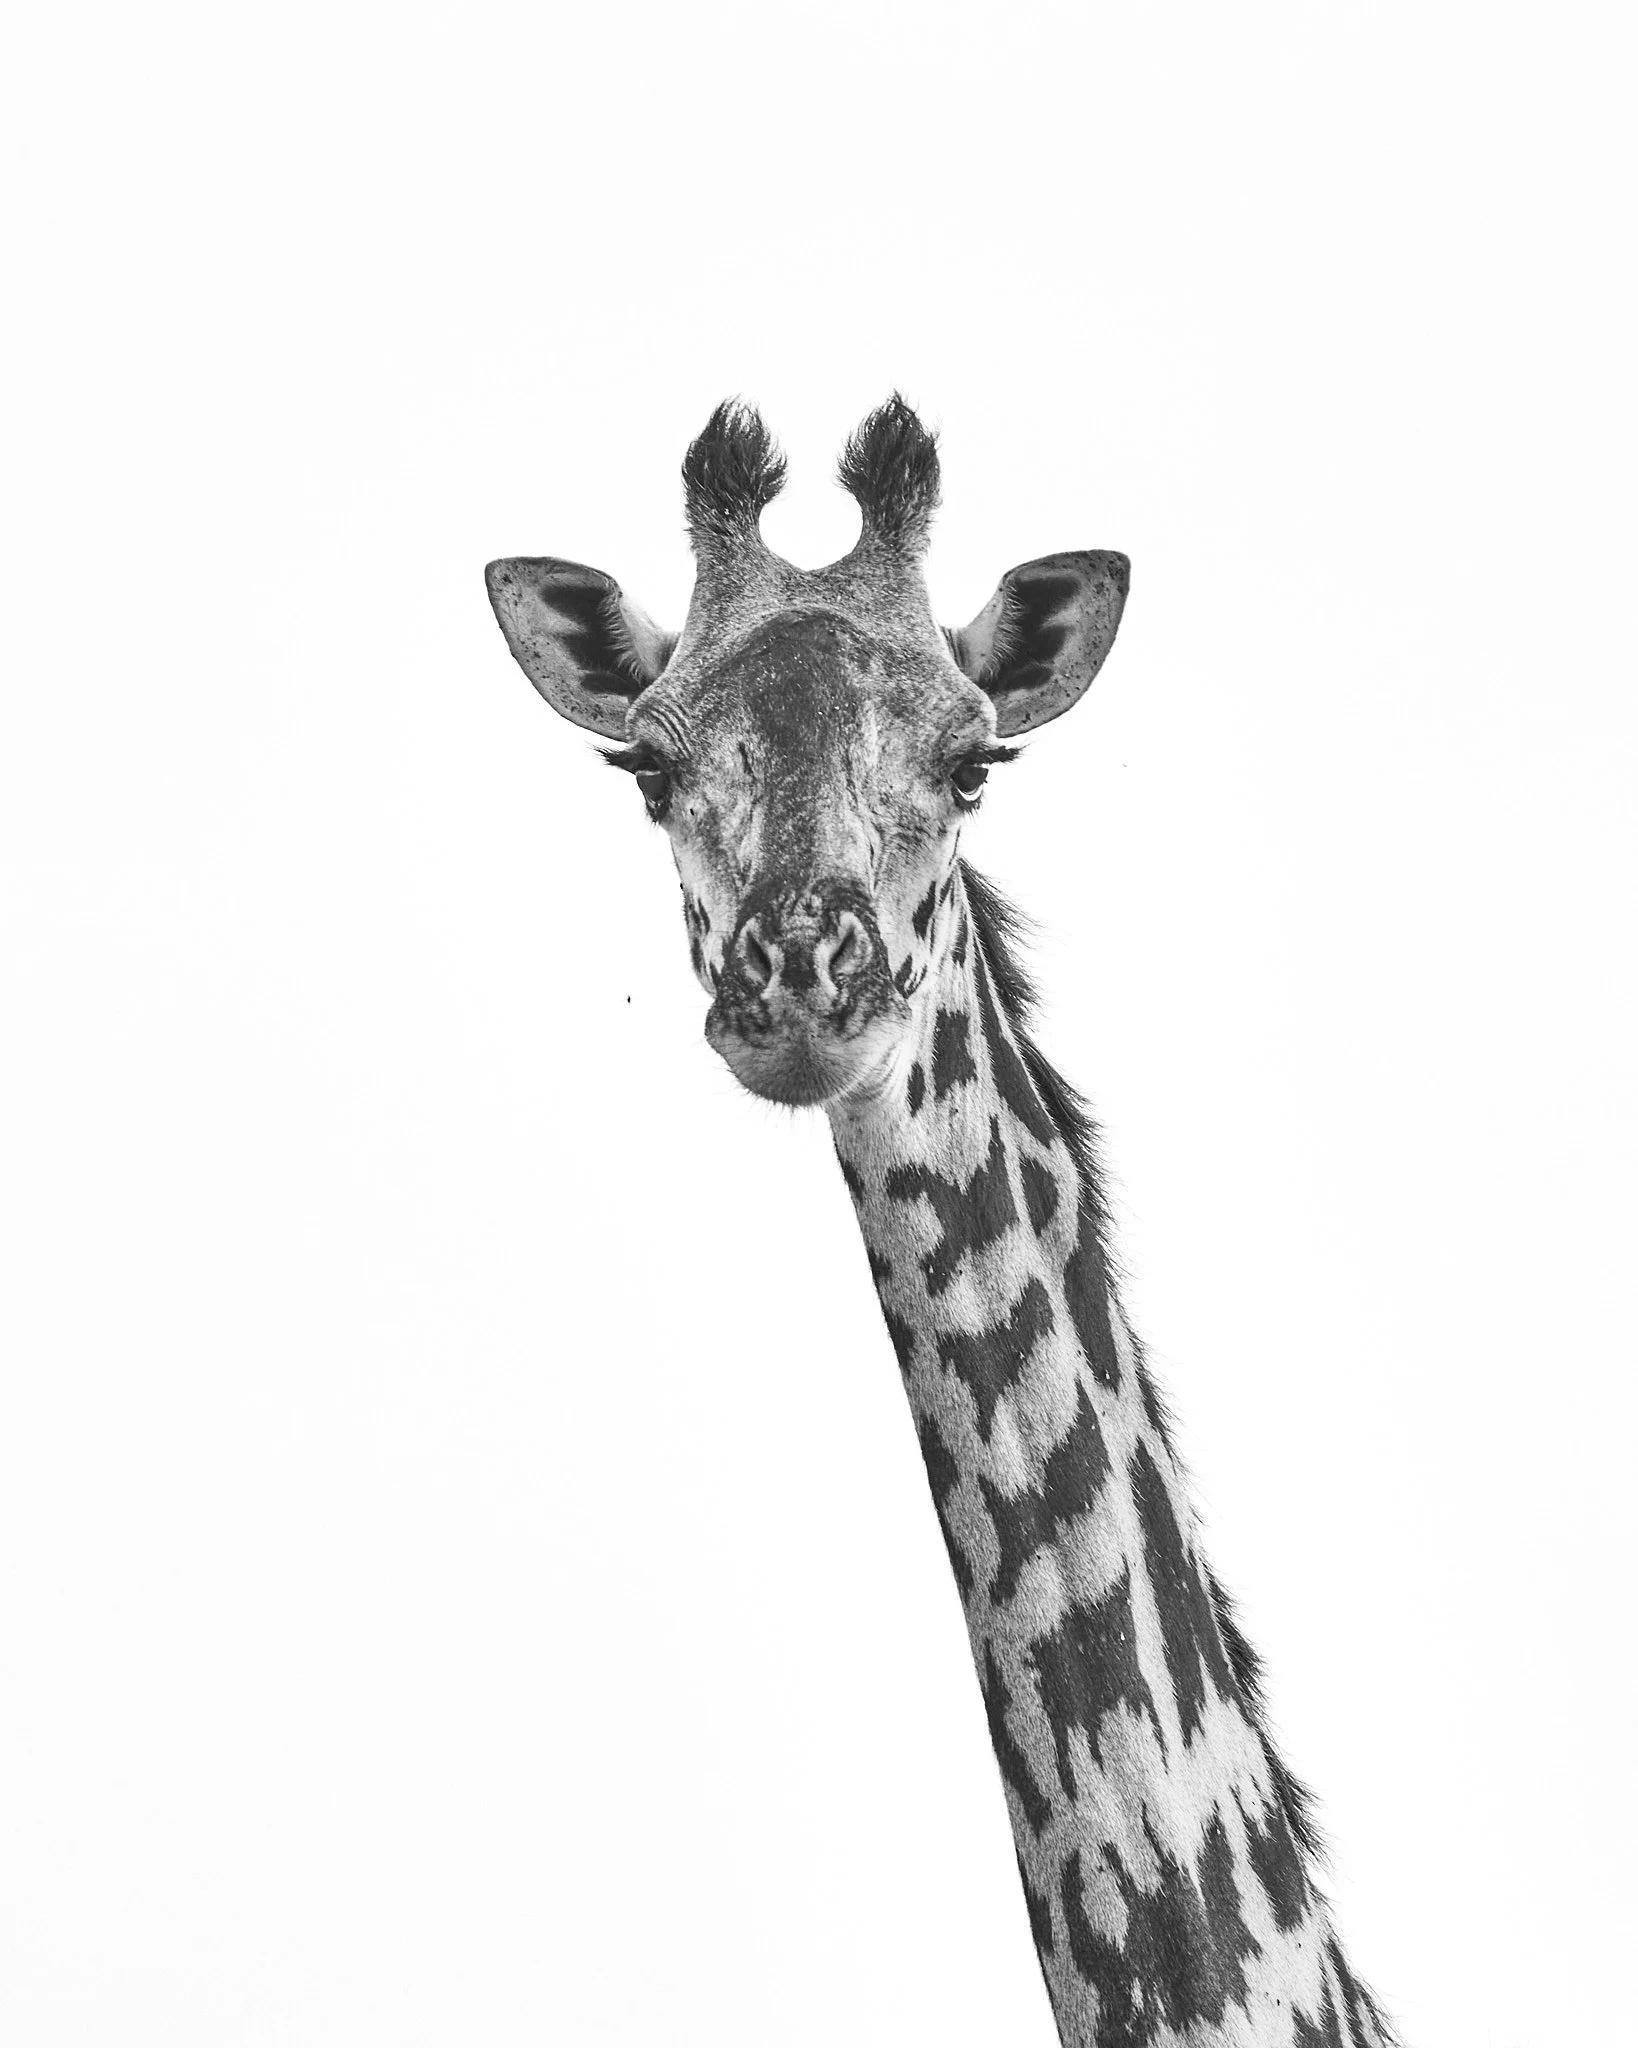
Results
The before and after examples below are just a few images I took on my trip to Kenya. These images were taken in challenging lighting conditions, producing an average color image. The pictures gain new appeal when converted to high-key black and white.
Have you used a high-essential black-and-white editing technique on images? Is there another editing technique you use when facing contrasting scenes and harsh light? Is there an editing technique you would like me to explore in my field notes? Let me know in the comments below. I’d love to hear from you. If you want to check out more wildlife photography or purchase wildlife photography prints, the links are below.